Featured image of post 一个使用 Cloudflare Pages 创建的 URL 缩短器

一个使用 Cloudflare Pages 创建的 URL 缩短器

利用Cloudflare pages部署

  1. fork本项目:https://github.com/x-dr/short

  2. 登录到Cloudflare 控制台.

  3. 在帐户主页中,选择**pages**> Create a project > Connect to Git

  4. 选择你创建的项目存储库,在**Set up builds and deployments**部分中,全部默认即可。

  5. 点击**Save and Deploy**,稍等片刻,你的网站就部署好了。

  6. 创建D1数据库参考

    d10

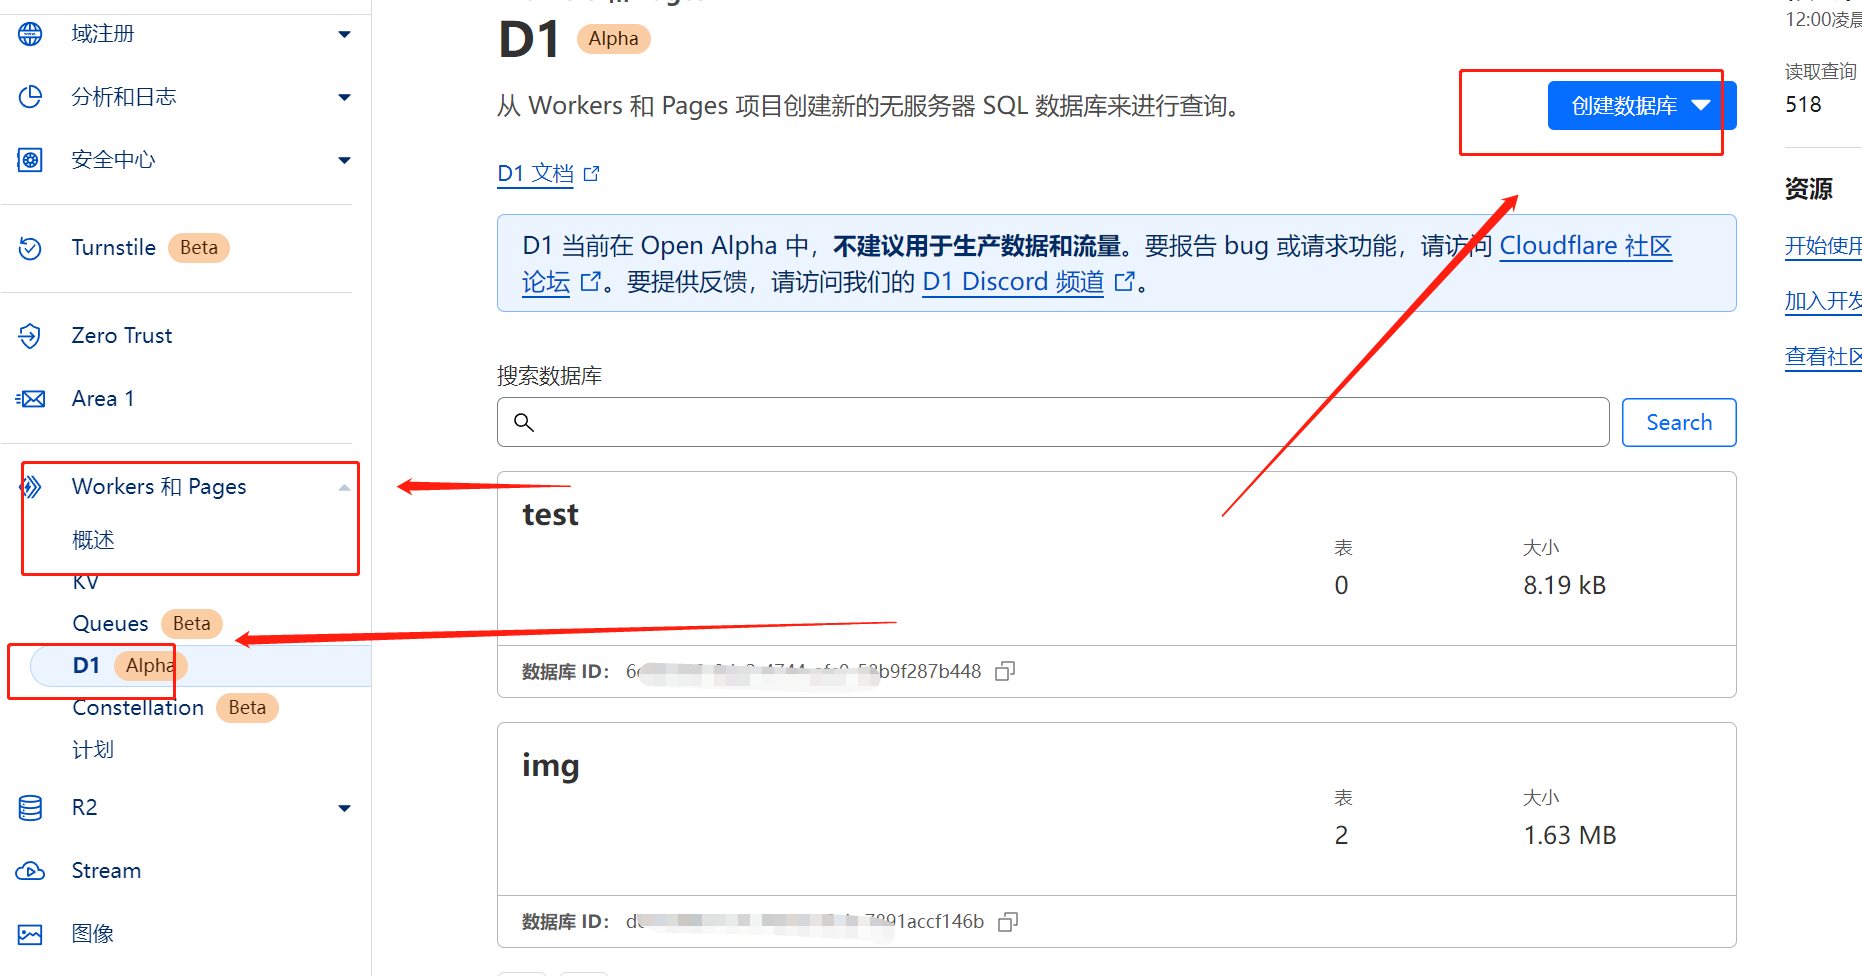
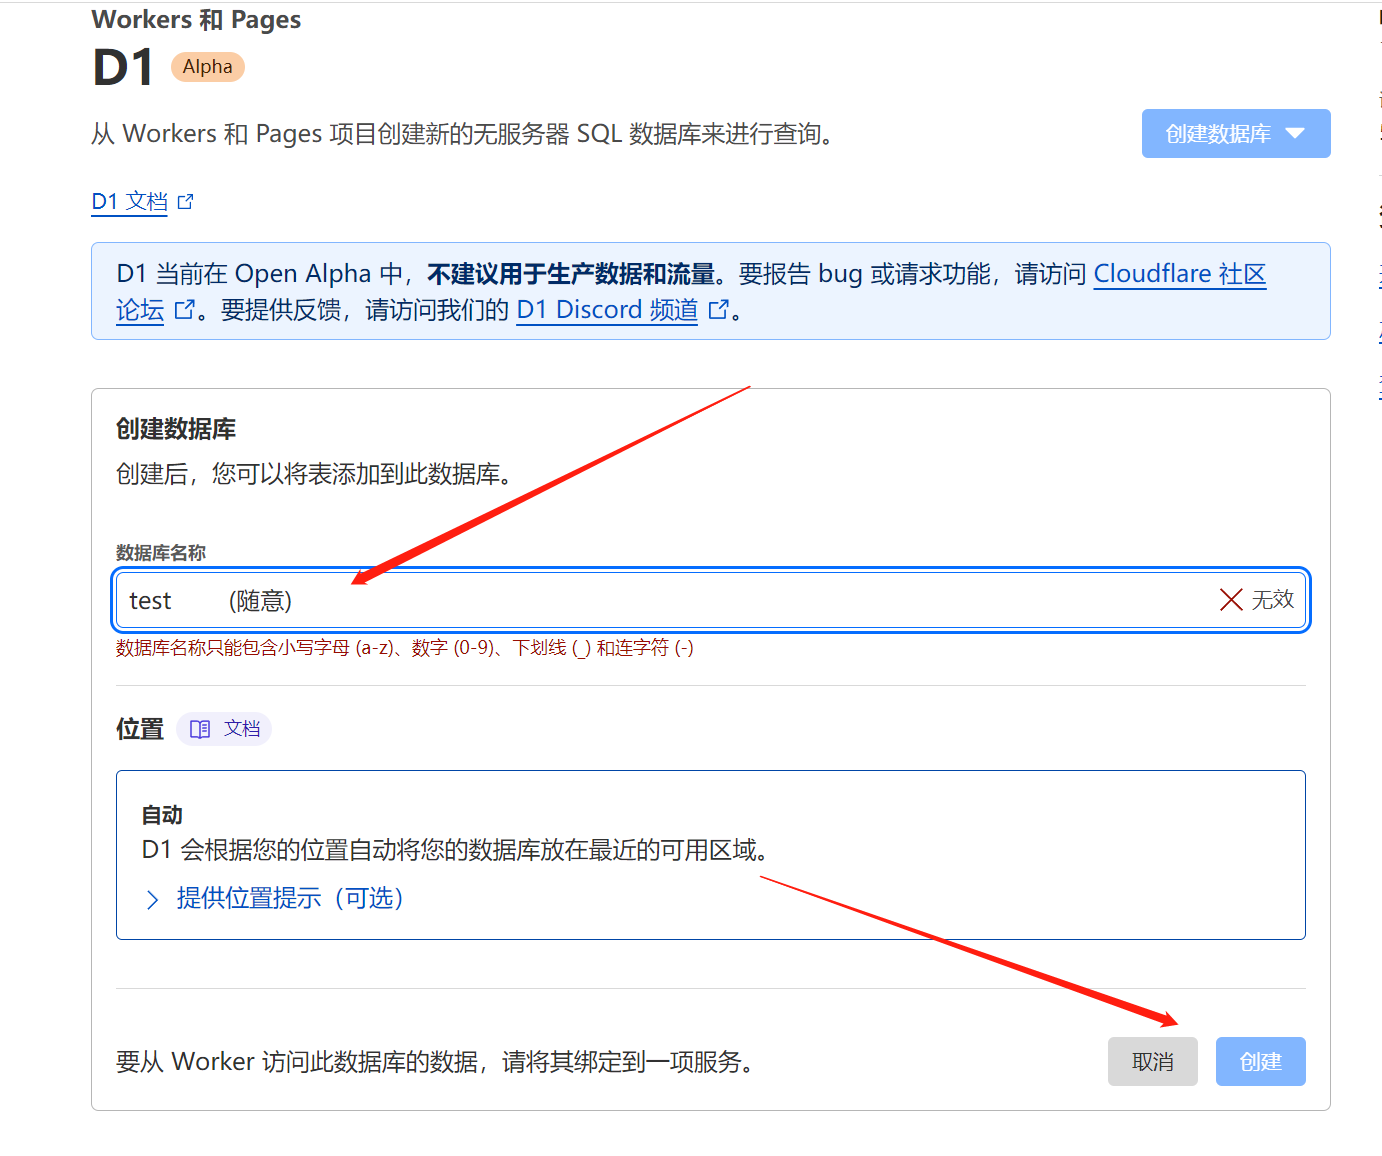
  7. 执行sql命令创建表(在控制台输入框粘贴下面语句执行即可)

    d3

 1
 2
 3
 4
 5
 6
 7
 8
 9
10
11
12
13
14
15
16
17
18
19
20
DROP TABLE IF EXISTS links;
CREATE TABLE IF NOT EXISTS links (
  `id` integer PRIMARY KEY NOT NULL,
  `url` text,
  `slug` text,
  `ua` text,
  `ip` text,
  `status` int,
  `create_time` DATE
);
DROP TABLE IF EXISTS logs;
CREATE TABLE IF NOT EXISTS logs (
  `id` integer PRIMARY KEY NOT NULL,
  `url` text ,
  `slug` text,
  `referer` text,
  `ua` text ,
  `ip` text ,
  `create_time` DATE
);

d5

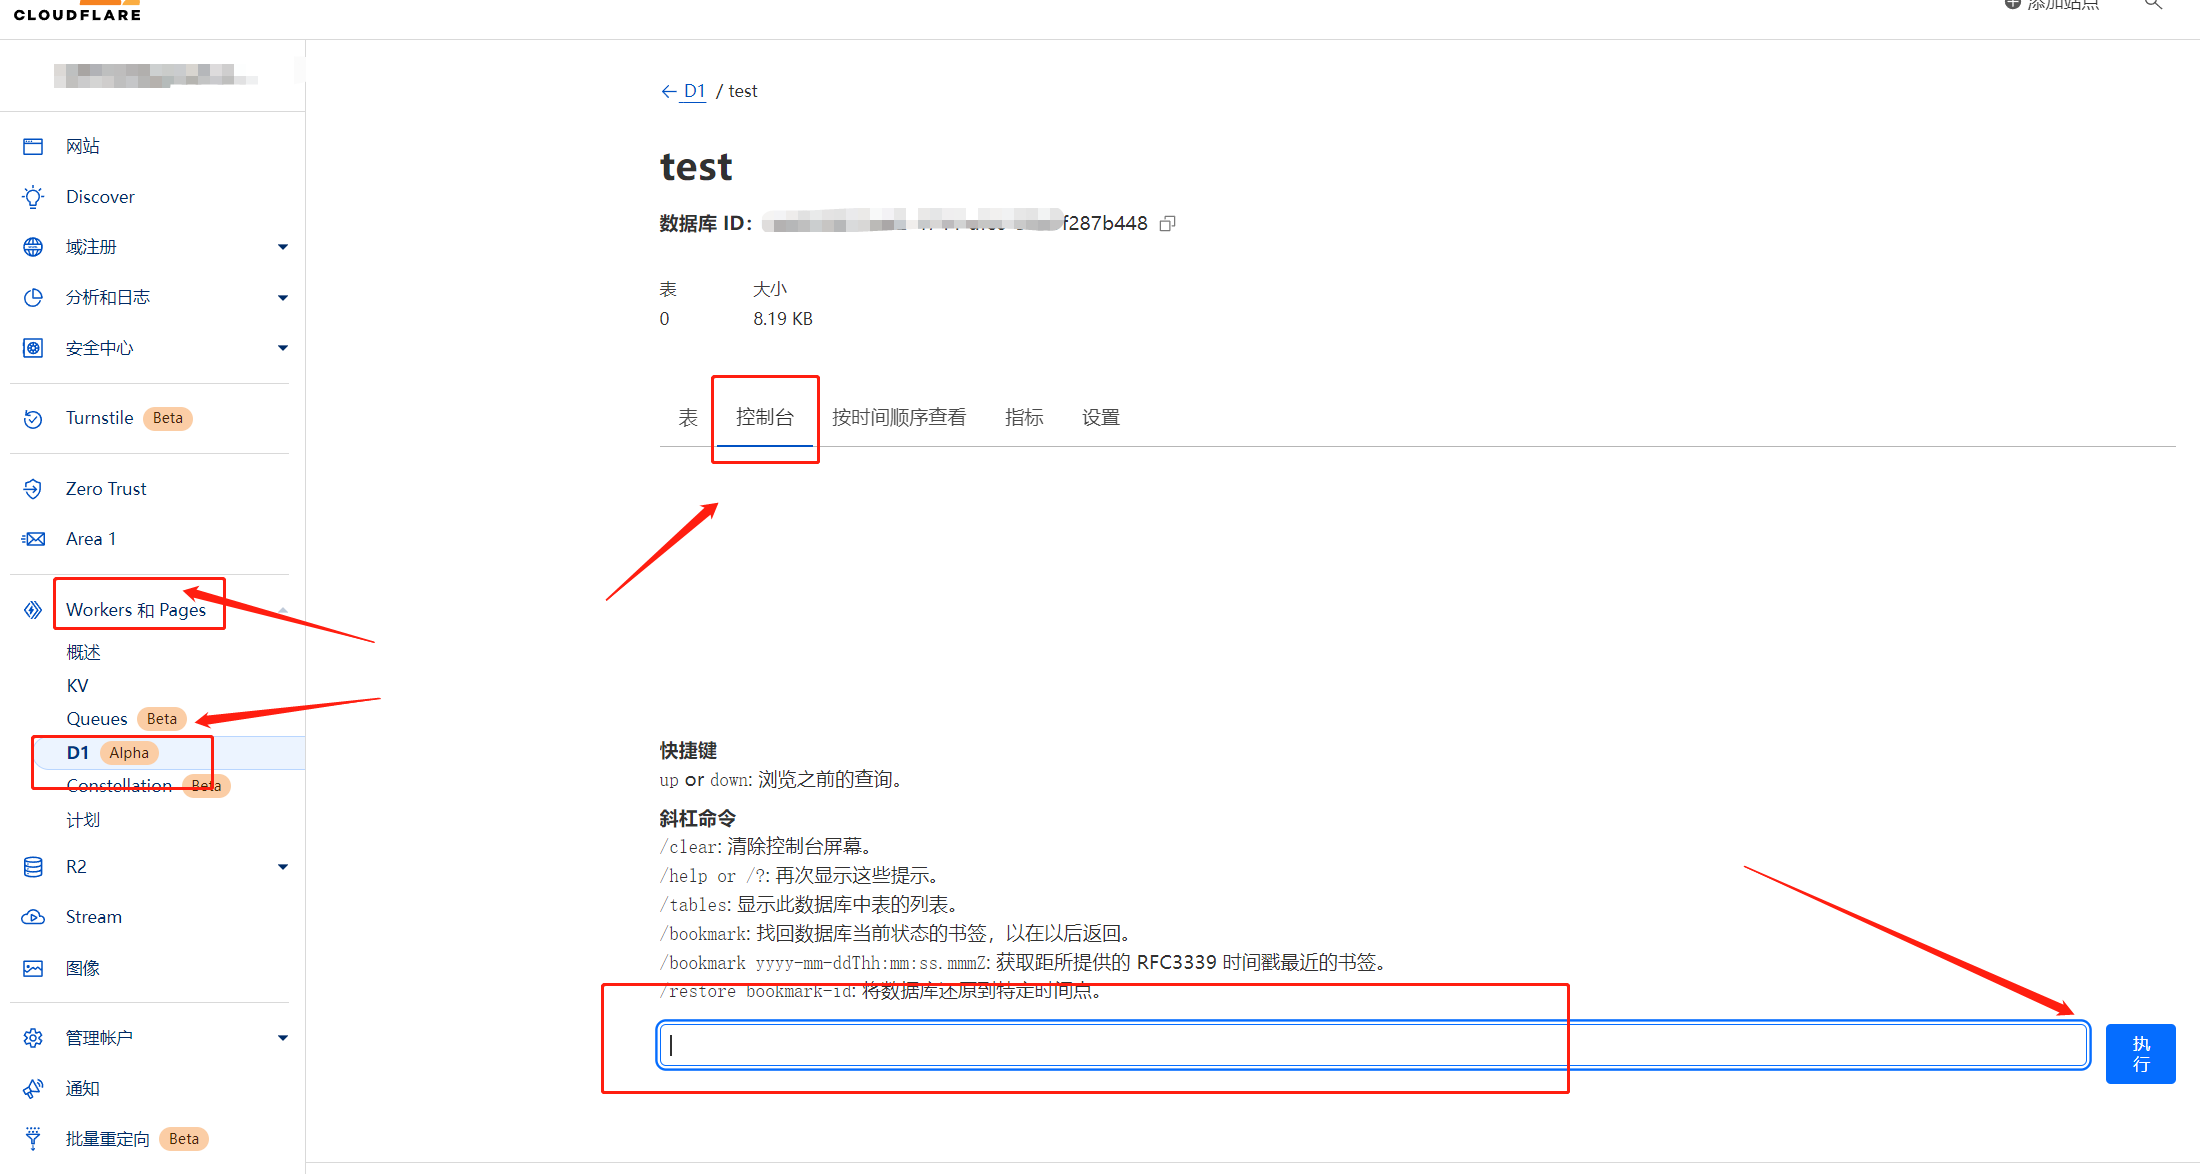
  1. 选择部署完成short项目,前往后台依次点击设置->函数->D1 数据库绑定->编辑绑定->变量名称填写:DB 命名空间 选择你提前创建好的D1 数据库绑定

  2. 重新部署项目,完成。

    d1end

API

短链生成

1
2
3
4
5
# POST /create
curl -X POST -H "Content-Type: application/json" -d '{"url":"https://131213.xyz"}' https://d.131213.xyz/create

# 指定slug
curl -X POST -H "Content-Type: application/json" -d '{"url":"https://131213.xyz","slug":"scxs"}' https://d.131213.xyz/create

response:

1
2
3
4
{
  "slug": "<slug>",
  "link": "http://d.131213.xyz/<slug>"
}
comments powered by Disqus
本博客已稳定运行
发表了77篇文章 · 总计103.35k字